Installation
Using the APTUS system eliminates onsite trades associated with vertical elements. Formwork, steel fixing and concreting trades are replaced with a two man install crew. APTUS elements can be installed with no temporary propping required in an average of 7 minutes per element.
Supervision of the installation must be carried out by an APTUS approved installation partner. APTUS can provide a supervisor to work with your crane crew. Alternatively, members of your site crew can become APTUS installation partners to ensure safe installation procedures are followed and all necessary QA documentation is collated.
APTUS installation partners are individuals trained in the safe and correct installation of APTUS elements.
- Step 1
- Step 2
- Step 3
- Step 4
- Step 5
- Step 6
- Step 7
- Step 8
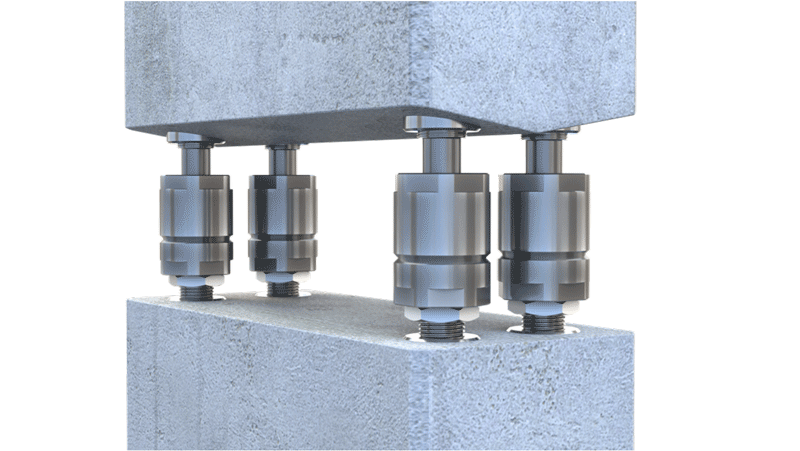
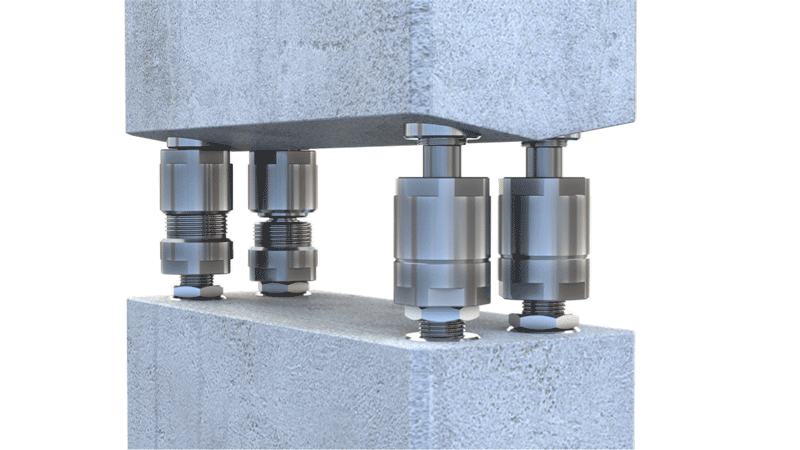
Step 1
- Inner Couplers 1, 2, & 3 are set to the required RL
- Inner Coupler 4 (and all other couplers) are wound down to avoid interference
- Inner Coupler 1 is secured in position with its lock nut
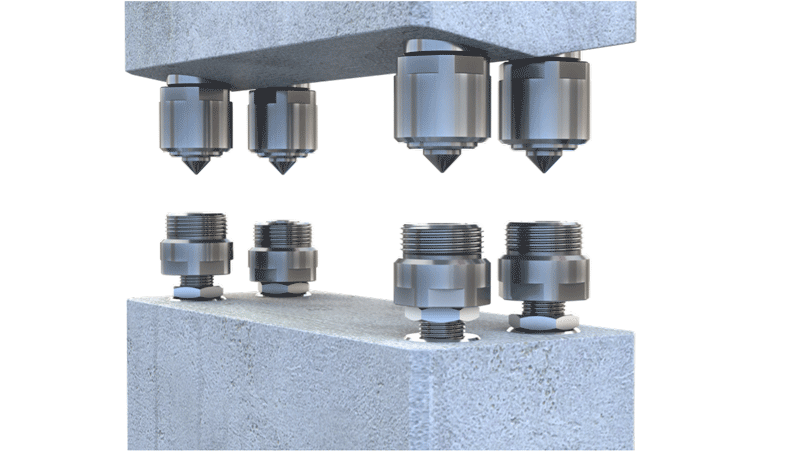
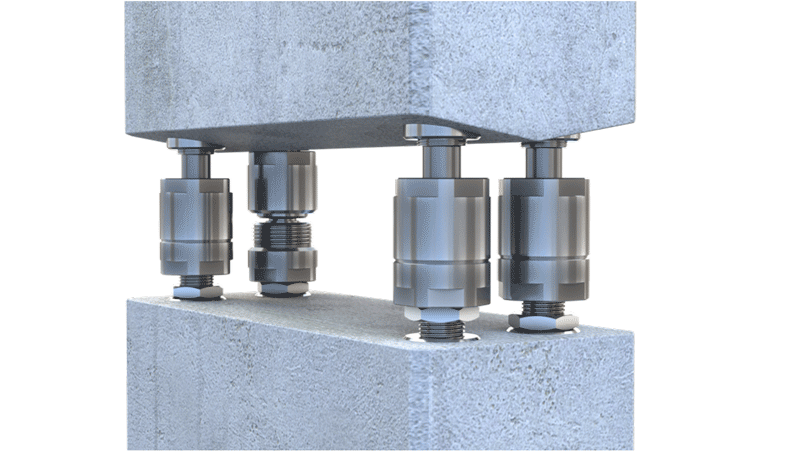
Step 2
- The precast element is lowered into position and seated onto the three pre-set couplers
- Note: Coupler 4 is not in position
- Levelling of the precast element will utilise only three couplers
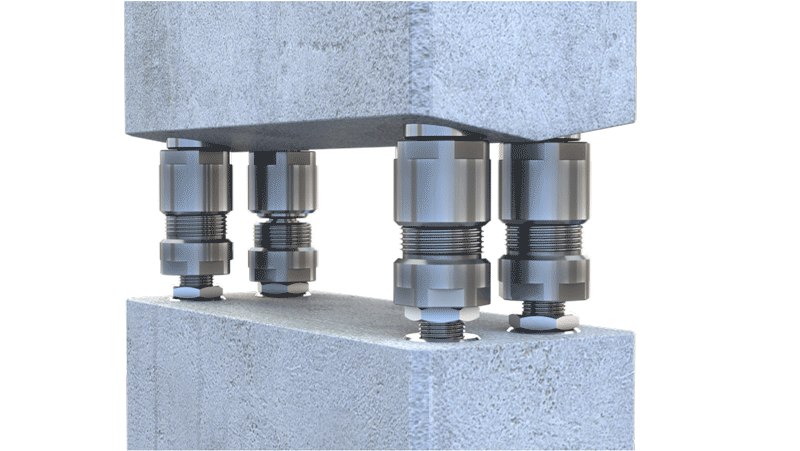
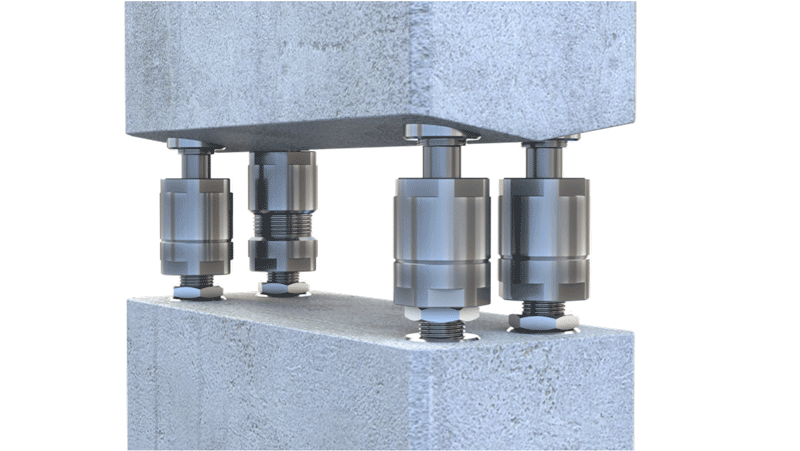
Step 3
- Outer Coupler 1 is engaged with its Inner Coupler
- Subject to the vertical alignment required in the first direction, Inner Coupler 2 is rotated left or right to lower or raise the precast element accordingly
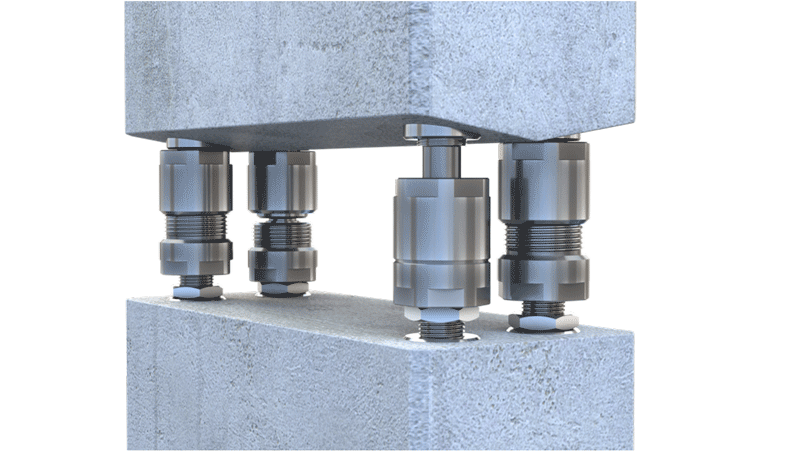
Step 4
- When the required vertical alignment is achieved in the first direction, Outer Coupler 2 is engaged with its Inner Coupler
- Subject to the vertical alignment required in the second direction, Inner Coupler 3 is rotated left or right to lower or raise the precast element accordingly in that direction
Step 5
- When the required vertical alignment is achieved in the second direction, Outer Coupler 3 is engaged with its Inner Coupler
Step 6
- Inner Coupler 4 (and all other couplers) can now be wound up to engage firmly against the Seating Stud
Step 7
- Outer Coupler 4 is engaged with its Inner Coupler (as with all other couplers)
- Crane can be disengaged

Step 8
- Secure all remaining Lock Nuts